Peel-and-stick materials began as a substitute for occupants who wanted style without a down payment disagreement. They have grown into a serious group of finishes and fixtures that, utilized thoughtfully, can stand up to every day life and provide purposeful interior renovation at a fraction of the expense and time of typical techniques. I have mounted miles of these products throughout apartment or condos, temporary rentals, and client homes, and I maintain returning to them for quick success, imaginative control, and the liberty to repeat. They are not ideal, and the distinction in between a slick result and a disappointing one typically boils down to the details. The goal below is to share what jobs, what fails, and just how to make these products look deliberate instead of temporary.
Where Peel-and-Stick Shines
The best usage instances share a couple of attributes: level or delicately rounded surfaces, modest wear, and the choice to replace or update within a couple of years. Kitchen areas and bathrooms take advantage of vinyl ceramic tiles that shrug off water. Bedrooms and living areas are ripe for detachable wallpaper or large-format murals. Office nooks react well to wood-look films on workdesks and cupboards. Also stairway risers can carry a patterned ceramic tile decal with a surprising amount of charm.
I first utilized peel-and-stick plastic slabs in a cellar rec area with a small dampness background. We laid a vapor obstacle, inspected the slab for high places, after that mounted mid-range high-end vinyl slabs with pressure-sensitive adhesive tabs. That flooring lasted 6 years prior to an occupant moved furniture with steel casters and gouged a few boards. The repair took an hour. We warmed the damaged planks with a hairdryer, lifted them, changed, and re-rolled. That a person experience offered me on the repairability advantage.
Understanding the Item Families
Lumping all peel-and-stick products with each other is a mistake. The adhesives, substratums, and wear layers differ widely.
Removable wallpaper is generally a woven or vinyl-coated movie with a low-tack adhesive engineered to release cleanly. It acts in different ways from typical paper; it has memory, it can extend, and it prefers smooth, topped wall surfaces. Plastic tile and slab flooring uses a pressure-sensitive adhesive that needs burnishing to fully trigger and benefits from adjustment time. Attractive movies for counters and cupboards are cast or calendered PVC with hostile glue and a release liner racked up for much easier handling. Backsplash sheets vary from foam-core fake floor tiles to composite metallic mosaics with gel-like domes. Each group has its own strengths, and the surface requirements you can sensibly expect are not the same.
- A quick decision guide: Walls: woven fabric or matte vinyl detachable wallpaper for the least sheen and ideal repositioning. Floors: thicker plastic slabs with a wear layer of at least 12 mil for low-traffic areas, 20 mil if kids, pets, or services are in play. Counters: heat-resistant PVC or family pet films ranked to at least 170 F, applied over smooth laminate, never over floor tile with deep grout. Backsplashes: composite PVC or aluminum sheets that can be trimmed with snips or an energy knife, ideally far from direct flame. Cabinets and furniture: wood-grain architectural films with air-release channels for much easier bubble management.
Surface Prep Is the entire Ballgame
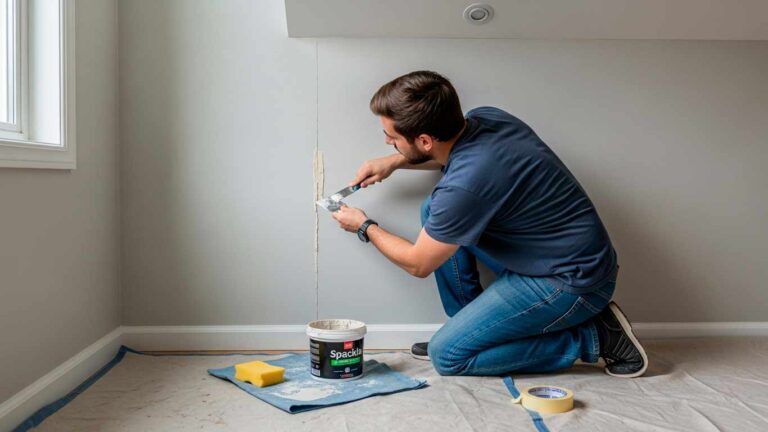
Every problem I read about peeling off edges or bubbles traces back to surface prep work. Adhesive-backed products want tidy, dry, and constant substratums. That indicates getting rid of oils, dirt, and silicones, and frequently it implies priming.
On wall surfaces, I clean with a weaken TSP replacement, rinse, let it completely dry, and then use a primer created for low-tack adhesives. Some brands specify a matte acrylic primer to stop chemical reactions with the adhesive. If the wall surface is level paint with a slight texture, a leveling skim coat and sanding might be warranted for murals with huge shade fields. On closets, I degloss, mess up sand with 220 grit, vacuum the dust, and clean with isopropyl alcohol. Avoid the alcohol on raw timber, which needs a closed surface area or the adhesive will certainly attack inconsistently and telegraph grain lines.
Floors are their very own globe. For tiles or slabs, any kind of deflection in the subfloor will certainly translate to gapping over time. I fill up and feather tiny dips with a self-leveling substance. If existing sheet vinyl is well adhered, tidy, and flat, it can be a good substratum. Ceramic floor tile with deep grout lines is not. Those valleys telegraph with plastic in weeks, not months.
Working With the Material As Opposed To Against It
If you have hung typical wallpaper, you recognize to book the paper, line up plumb, and exercise bubbles. Removable wallpaper acts differently. It favors a completely dry set up with a really felt squeegee, working from the center out. The method is to spread out brief sections, maintain the panel under small tension, and let the glue kiss the wall surface before you devote. If an edge battles you, peel off back delicately and warm it with a hairdryer to loosen up the film. Do not over-stretch. Stretching appear like a repair, however it rebounds over night and creates joints that open by a millimeter, simply sufficient to capture light and disclose the pattern break.
Flooring wants firm stress and heat on persistent edges. I roll every installation with a 75 to 100 extra pound floor roller when room allows, or a hand roller and serious effort in tight quarters. I constantly accustom planks in the space for at the very least 24-hour, often 48 if the period swings. Plastic is dimensionally steady, yet that tiny adjustment matters for limited joints. If a slab seems bowed, I put it aside and use it for cut items at the perimeter.
Counter movies and cabinet covers take advantage of the two-person method. One feeds and lays the product, the other functions the squeegee and heat gun. You are not attempting to thaw the plastic, simply soften it enough to comply with sides and curves. Sharp within corners are infamous failing points. I ease them with a tiny outward notch so the product fulfills without compressing. The side finish figures out whether a cupboard cover looks bespoke or like a bandage. When feasible, cover sides around to the back and end at a surprise line, never specifically on a front corner.
Pattern Alignment and Seams
Patterns require even more planning than most people anticipate. A 21 inch repeat on a six-panel wall means you will certainly waste more than a 3rd of a roll matching decreases, and the waste boosts with massive themes. I dry-fit the initial 2 panels on the floor to verify shade and print variation, after that note a plumb line on the wall surface that divides a window or a prime focus uniformly. On distinctive motifs or fake tile, I prefer a top-down alignment that permits the eye to follow a line across an area. If the room runs out square, and numerous are, let the pattern pass away right into an edge with a controlled taper rather than bending the print at mid-wall.
Seams in plastic floor tiles or slabs are less concerning pattern and even more about micro-lippage. I check every seam with fingertips and body light at a low angle. A joint you can not really feel will still capture glow at sunset. Heat and roll, repeat. Stay clear of running plank seams precisely where chairs pivot. In dining spaces I revolve the format so the long joints sit under the table rather than radiating from it.
Durability, Cleansing, and When to Replace
Realistically, peel-and-stick installations have a life process. In low-stress spaces, an excellent wallpaper might look fresh for five to seven years. In kitchen areas, especially near an array, expect three to 5, unless you have a durable air vent hood and precise cleaning habits. Vinyl floors can run 10 years if the substratum is dry and the wear layer is thick, though rental turnover reduces that.
Maintenance is straightforward. Moderate cleaning agent and water help almost every little thing. Avoid solvents that can liquify adhesives or dull coatings. For backsplash panels with a gel topcoat, a soft sponge avoids micro-scratches. High-heat locations are worthy of special focus. Even heat-rated movies will endure if a toaster oven or pot vents heavy steam at point blank array every early morning. In those areas, a slim strip of genuine floor tile or a stainless plate behind the device silently addresses the problem.
When edges start to lift, act prior to crud migrates under the film. Warm the area, lift carefully, clean both surfaces with alcohol, and re-press. Manufacturers sell primer pens that boost bond on corners and joints, worth maintaining in a kit. If a section really stops working, do not wait to change it. The factor of these systems is modularity.
Cost and Value
The raw numbers shift by region and brand, yet helpful ranges hold. Removable wallpaper ranges from 1.50 to 6.00 bucks per square foot, with premium prints and structures at the high-end. Plastic slab peel-and-stick flooring rests between 1.20 and 3.50 dollars per square foot, not including underlayment or devices. Architectural films for cabinets and counters differ extensively, 1.00 to 5.00 bucks per square foot, with wood grains and combed steels commonly much more expensive than solids.
Labor transforms the calculus. A single weekend break can transform a rental cooking area with 300 dollars in movie and a couple of tools, while a complete closet refacing would set you back thousands. If you are determining between changing laminate counters and wrapping them, ask for how long you intend to remain. A cover can buy a couple of years of aesthetic tranquility for a couple of hundred dollars, which is usually the right relocation while you conserve or prepare an even more intrusive remodel.
Rooms, Products, and Pragmatics
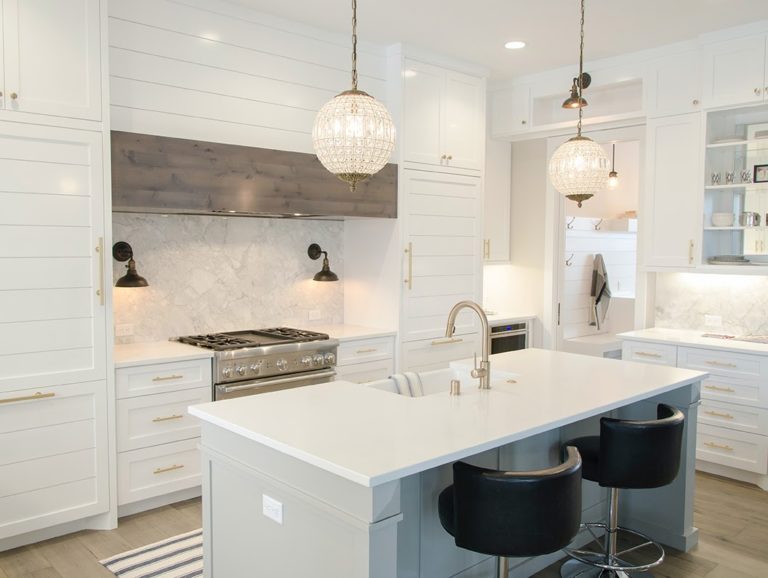
Kitchens compensate restraint. Instead of wrapping every cupboard, concentrate on uppers or the island. Light colors reflect, however also reveal discolorations at the pulls. A mid-tone wood grain on the island with satin equipment reviews willful and flexible. For backsplashes, I favor matte or lightly textured styles; glossy gel floor tiles pick up every under-cabinet light hotspot and can look plastic in brilliant daylit cooking areas. Under-sink cabinets are entitled to special focus. Adhesives and humidity do not blend. Seal any type of leaks and take into consideration mechanical fasteners for side trims near the sink.
Bathrooms like large-format patterns since there are fewer aesthetic breaks. Stay clear of wraps on shower wall surfaces. Even items classified waterproof do not appreciate everyday thermal biking. Instead, make use of a feature wall outside wet locations and think about peel-and-stick floor tile with thicker wear layers. Bathrooms benefit from caulked sides where flooring meets tubs or commodes. Use a tiny grain of adaptable sealer to keep water out without gluing the entire perimeter.
Living areas and rooms are excellent for murals. I set up a 12 foot large forest scene in a baby room and, when the youngster transformed five, replaced the center panels with an extra abstract pattern while maintaining the external bands. That modular ability is one-of-a-kind to removable systems. For occupants, a single accent wall is commonly the pleasant area between personal expression and move-out workload.
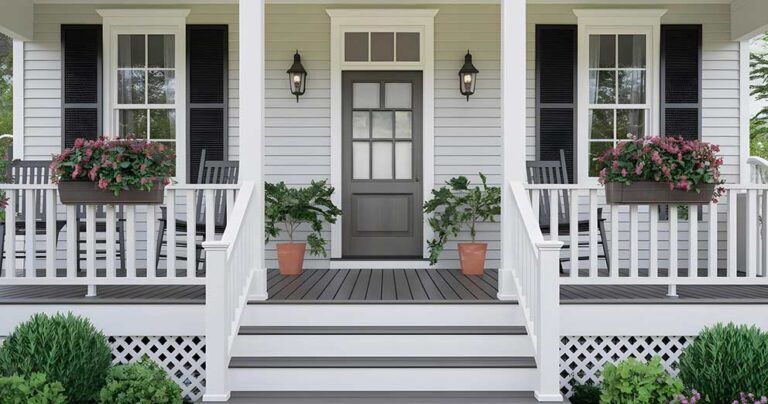
Hallways, stair risers, and entries can take bolder pattern due to the fact that you are travelling through instead of living there. Ceramic tile stickers on risers raise a staircase with marginal effort. If you have open risers or nosings that attract the eye, trim the sticker 2 to 3 millimeters timid of the side to avoid catching with shoes.
Home offices are where peel-and-stick timber grain movies radiate. They can conceal a dissimilar workdesk, unify storage space, and create a visual divider panel behind a camera. Maintain the grain direction consistent across surfaces. If the desktop computer runs front to back, wrap the drawer deals with parallel to avoid visual noise.
The Substrate Concern: When It Is Not a Great Idea
There are areas I do not make use of these items. Textured plaster wall surfaces with heavy trowel marks will not take wallpaper well, and sanding them flat is a bigger job than many people enroll in. Raw brick eats adhesive and reveals every bump. Glossy latex paint with silicone ingredients repels adhesive. You can sand and prime, yet at that point, choose whether paint alone might achieve the look.
Floors with dampness issues will certainly beat peel-and-stick swiftly. A cellar room with seasonal wetness will lift edges. Do a simple test: tape down a square of clear plastic over night and check for condensation. If existing, select a floating floor with an ideal underlayment rather than adhesive-backed tiles.
Counters directly beside high-BTU heaters, or where pots regularly overhang, need to not be covered in plastic. A metal or rock insert behind the variety is a much better idea, even if it is an easy stainless sheet cut to width. Likewise, shower borders and steam rooms are not candidates.
Tools, Technique, and Time
A small toolkit offers professional outcomes. My core kit consists of a big really felt squeegee, a difficult information squeegee, a sharp utility knife with snap-off blades, a heat weapon with low and high settings, a seam roller, a measuring tape, a long level or laser, and alcohol wipes. Include a 4 inch J-roller for floor covering, a 75 extra pound floor roller for larger rooms, and a guide pen for corners.
- A compact step-by-step for a clean wallpaper mount: Mark a plumb line one to two inches from your starting corner to make up for out-of-square walls. Peel back 12 to 18 inches of the lining, stick the top, and smooth downward in overlapping passes with a really felt squeegee. Overlap seams by a few millimeters if the producer enables, after that double-cut with a straightedge for a factory seam. Use low warm to unwind persistent bubbles, training and re-smoothing as opposed to compeling air to the edges. Trim at baseboards and cases with a sharp blade, altering blades typically to stay clear of fuzzed edges.
Time is forgiving at the beginning of the discovering curve and ruthless at the end. The first panel always takes the lengthiest. Do not hurry it. After that, you establish a rhythm and can plan breaks at all-natural pattern repeats. For flooring, pre-cut the last row to size while the primary field is open, then end up sides in a batch.
Making It Look Intentional
The difference between "tenant hack" and "custom-made" commonly depends upon terminations, exposes, and transitions. Where a film fulfills a wall surface, consider a slim light weight aluminum side trim or a painted wood strip. At baseboards, as opposed to butting the vinyl directly, leave a consistent 2 millimeter disclose or run a footwear molding to hide the cut. With counters, conceal the joint at a sink intermediary preferably. For murals, start from the function axis of the room so the pattern fixate a bed or couch as opposed to a corner.
Color and appearance choices matter extra with peel-and-stick since even minor sheen differences can indicate "applied layer." Go matte or satin for wall surfaces, get high gloss for tiny accents. In cooking areas, cleaned steel films on home appliances can coordinate with stainless pulls, producing a story instead of a jumble. If you are covering oak cabinets with noticable grain, choose a movie with an in a similar way pronounced texture, not a level shade that will certainly combat the shadow lines.
Lighting can make or damage the illusion. Under-cabinet LEDs disclose surface structure mercilessly. If your backsplash is a foam-based floor tile, lowering the lights or selecting a warmer shade temperature softens reflections. In living areas, situate joints away from flooring lamps with narrow beam of lights to lessen raking light.
Environmental and Health and wellness Considerations
Vinyl-based products are durable and practical, but they raise legit inquiries regarding interior air quality and end-of-life disposal. Numerous credible brand names release VOC certifications. Search For Greenguard Gold or comparable ratings for wallcoverings. Air out rolls for a day prior to installation to off-gas in a ventilated room. During elimination, warming up adhesives reduces particle launch and preserves the substrate.
For floorings, pick phthalate-free choices when feasible. The expense distinction has actually tightened, and the benefit to indoor air quality is rewarding, specifically in nurseries or bedrooms. Dispose of scraps sensibly. Some towns approve clean vinyl for reusing, though access differs extensively. If sustainability is a core top priority, think about detachable material wallpapers or paper-based products with water-activated adhesives, which inhabit a smaller ecological footprint.
Troubleshooting the Typical Headaches
Bubbles that appear days later usually suggest outgassing from the wall surface or caught dirt. Small bubbles can be addressed with a pin prick and gentle smoothing, yet constant bubbles recommend a prep issue. In that case, training and cleansing the location is better than chasing after each defect.
Seams opening at corners are usually the result of thermal activity or overstretched product. Include a guide strip at the corner, after that re-install with minimal tension, or change the seam away from the corner totally. If you find edges collecting lint, somewhat bevel the cut with a fresh blade so the edge rests more fully.
Pattern inequality after a couple of panels is a traditional trap. Floorings and wall surfaces are rarely square, and cumulative mistake builds up. Reset by splitting the difference throughout the following two panels instead of forcing an ideal suit on one and leaving a glaring imbalance on the various other. In a hectic pattern, a one to two millimeter fudge along a non-critical joint is undetectable to everybody but you.
Adhesion failing near warmth sources is not constantly the product's fault. Micro-grease deposits threaten bond. Degrease with a stronger cleaner, after https://tysoninqk965.fotosdefrases.com/watercolor-paintings-for-home-soft-and-subtle-charm that wash completely. Move little devices somewhat ahead or use thermal barrier. In leasings, consist of a card near the variety reminding passengers to keep kettles and toasters a couple of inches from the wall surface. It seems picky, yet it conserves you from rework.
When to Call a Professional
Most peel-and-stick projects welcome DIY, yet there are instances where a specialist earns their maintain. Architectural movies on huge panels, like complete refrigerator wraps or piece doors, take advantage of installers that handle air-release films daily. Bent surface areas, substance edges, or high-value items are additionally candidates. In a similar way, huge mural walls with complicated pattern repeats can test patience and waste material. A professional team will complete in hours what may take a weekend, with less joints and cleaner edges.
Even if you do the work on your own, a fast appointment can develop the plan. An experienced installer can stroll an area, point out substrate problems, advise primers, and conserve you from choosing a gorgeous yet inappropriate item. That hour of time frequently spends for itself in prevented mistakes.
From Small Relocate to Whole-Room Transformations
Interior enhancement does not constantly need demolition. A thoroughly selected set of peel-and-stick treatments can move a space from tired to tailored in a day. In a current one-bedroom leasing, we wrapped a yellowing laminate counter in a cozy gray stone-look movie, switched chrome pulls for matte black, added a clay-toned textile wallpaper to a single wall, and used faux-tile decals to a 36 inch backsplash zone behind the array. The materials cost approximately 500 dollars. The apartment or condo photographed better, rented quicker, and the owner currently plans seasonal updates that maintain need high.
What makes these remedies powerful is not just the inexpensive or the rate. It is the convenience of model. You can attempt a strong pattern in a guest space without a decade of commitment. You can evaluate a timber tone on a desk before you invest in customized millwork. When your taste changes, you are not stuck. The secret is treating the job like craft rather than a faster way. Prep the surface, mind the pattern, recognize the sides, and do with intention. Done in this way, peel-and-stick materials come to be a reputable component of your indoor enhancement toolkit, not a compromise you endure, however a technique you choose.